Shield Clicker Project Part 2

Hello and welcome back to the Shield Clicker Project today we will be going to add code to our shield that will allow us to actually accumulate shields that we will be able to spend in the Shop.

To start we need to add an on event for when the shield is clicked

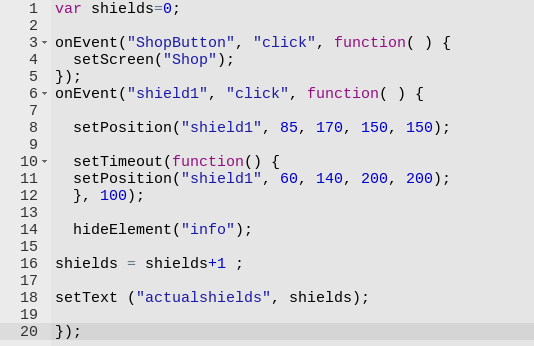
I’m sure this code looks intimidating but I’ll explain what it does in small sections essentially going line by line

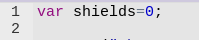
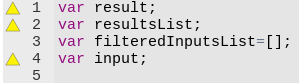
In the first lines we are establishing our variable shields that we can add to every time the shield is clicked and give it an initial value of 0.

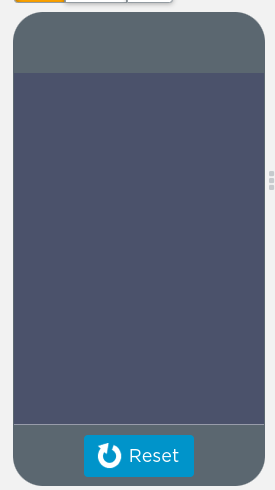
I’m skipping over lines 3-5 because I went over those in the last post so check back there if you need to. These lines make it so that when our shield is clicked it makes it smaller and changes it’s position slightly giving it almost a bouncing effect every time it is clicked.

These lines allow the code to wait 100 milliseconds with the set timeout command before restoring the shield to its previous size which completes the bounce effect.

This code very simply hides the info at the bottom of the screen that tells you to click the shield for the first time.

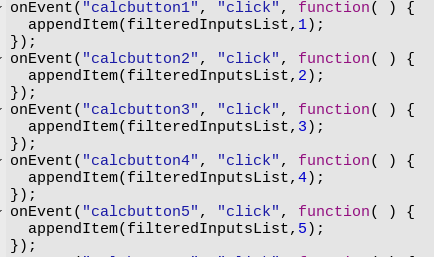
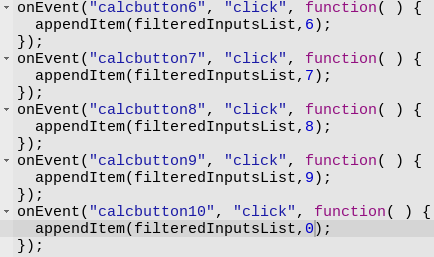
This code makes it so that every time we press the shield it sets the value of our variable shields to its current value + 1.

This code sets the text of a second text box I had to make to the actual count of our shields and the symbols at line 20 are what complete our on event and finalize its function. And all the above code runs each time the shield is clicked.

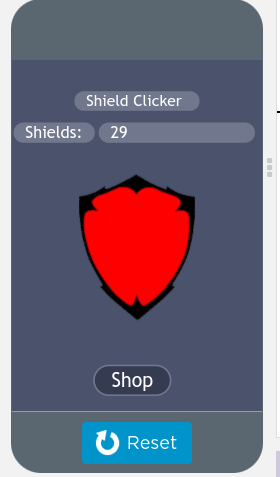
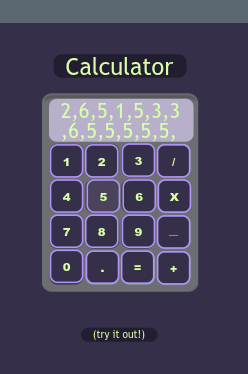
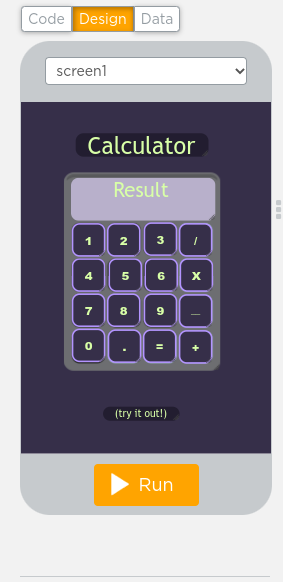
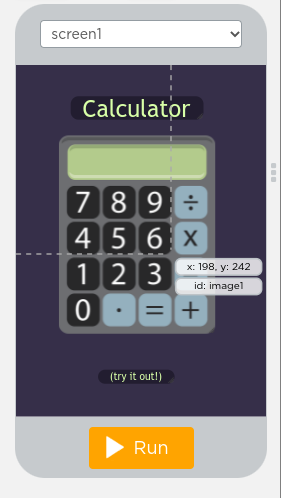
The shield UI looks like this after about 29 clicks and stays very similar no matter how many times it is clicked.

That’s it for this lesson that was primarily focused on basic coding. In tomorrows part we will be going more in depth into our shop and we will start some code there to upgrade our shield.

Thank you for reading and have a good day.

New Cookie Clicker Project!

I got inspiration from my last project to create this brand new cookie clicker project. Mainly when I was unable to figure out what was wrong with my lists but I tried adding a .length to my list and I was able to find how I could make a cookie clicker game in a similar way. Anyway lets get started.

This game of mine will actually not involves cookies but more rather the player will be clicking a shield that will be upgrade able. Obviously to start I will need to find some images I like.

This is the shield icon I ended up choosing but you really can use anything. From here I will add this into code.org and begin working on a UI and possibly the code.

I made a pretty basic UI with all the necessary parts and a shop button which takes the user to the shop screen this will be some of the first code that I will be implementing into my game.

To make this code we will need to grab an on event and fill in the blanks with what we want the code to act upon.

This will now allow us to add a function that the app will perform once the shop button is clicked. In this case it will be taking us to a different screen.

Now lets test it out.

And just like that as soon as we run the code and press the shop button it takes us to the currently blank shop screen. Now I will make this UI and then begin working on some more code.

At the moment this shop AI is very basic because I haven’t decided what to add to it yet. And for right now I will mostly be working on the main screen for code so I’ll get back to this later.

But I think that’s it for this part of the project I hope you enjoyed and in the next one we will be coding our shield. So stay tuned!

Java Script Project Part 3

In this part of the project we will be working on getting our display to actually output the numbers that we click now that they are in a list that we can access the items in out list.

We add this code to all of our number buttons so that we can add their values to the calculator. They will look something like this.

From here we can begin working on our operations buttons. At the moment however I do not know how to code numbers that are bigger than a single digit so we might have to continue this project another time.

Ill work on these operations buttons in the future but for right now I will move to a slightly simpler project for a little while until I can figure out how to make my calculator work properly.

Thank you all for reading sorry this post is shorter than usual there will be 2 coming out tomorrow.

Java Script Project Part 2

In this lesson we will be going over the basic code for the buttons on our calculator. Seeing as we already have the basic UI we can now focus on making the actual calculator work. To do this we will need a list.

These will be my variables as of right now

The reason these images have the yellow triangle is because they have not been called/used yet in my program there is no other error with them.

Now that we have established some variables I will need to start adding basic code to the buttons that will allow us to add their values to our inputs list and then eventually to our results box.

This is the code for numbers 1-5

And this is the code for buttons 6-0

That’s pretty much it for this blog it was a short one as I didn’t really have that much done because I’m on break but next lesson we should be able to program the operators and these inputs in our list should be in our results box as well.

Java Script Project Part 1

Now that we set up a basic calculator design screen we can work on adding buttons to make it work. Because at the moment all it does is sit there and look nice.

The first buttons we are going to add are going to be the number buttons that will add text to the calculator output. Once you have added all the actual buttons to the calculator we will number it 1-9

Once we add our buttons we will need to set up our sign buttons for the division sign multiplication equals and plus as well as the decimals place.

Now we will add some finishing touches such as the response text box and we are basically done in terms of designing the UI or user interface of our app.

This is our final result for this blog I hope you enjoyed and as always feel free to check out my you tube channel for gaming and cooking videos: https://www.youtube.com/channel/UCrlNUqQVBxLIbdltHQBdcYg

Java Script Lesson 4: Using the App maker Screen! and beginning of our calculator app

In this lesson we will finally be using the actual app maker screen to make some real running code and this will be our final lesson before we make our calculator. Because it wont make much sense if we don’t know how to use the screen it will be made on.

Our first main screen items will be buttons. These will be what trigger actions on our screen. Making them an essential part of our overall app. To access the layout of our screen we will need to select the design tab. Like this:

This now gives us access to all the possible items that we can add to our screen I will begin to make the base shape of our calculator. Using the image item in our toolbox.

This is how I decided to design my basic calculator screen but you can design it however you would like. These buttons don’t actually do anything so I will need to add my own buttons on top of them to actually start coding but I will do that later. As far as this lesson goes That’s all we really need to do as each persons calculator design will likely be different.

As always feel free to check out my youtube channel for cooking and gaming thingss. link: https://www.youtube.com/channel/UCrlNUqQVBxLIbdltHQBdcYg

Java Script Lesson 3: Comparison Operators aka Booleans

These operators are also pretty important to as it says compare things. They are called boolean(s) and generally have 2 choices that then checked with an operator like and, or , and not.

In Java script however they are typed like this “&&” and is 2 and signs or is two “||” and not is “!=” so the way a boolean expression would be formatted is console.log (“Hello” && “World”); and it should work like this.

The reason this doesn’t work is because it isn’t like an addition sign and it is meant to compare conditions that need to be met in order for something to word and not to fuse words together.

But now we should work on the actual uses of these operators. Say you needed to see if the temperature on a thermostat was at max or min you would make a variable temperature and write a piece of code saying if (temperature >= 90 C || temperature <= 10 C) Then display “This temperature is not on the thermostat”

As you can see our operator works just as intended and so did the code the only problem is that it has to be reset and rerun every time the temperature is updated. So we need to start working in the actual app designer which allows us tons more possibilities.

But we need to cover one final thing before that which is our signs which include >,<,>=,<=,=,!=. They mean greater than, less than, greater than or equal to, less than or equal to, equal to, and not equal to. These will also be used in combination with our not’s, and’s, and or’s to compare lots of data and information as I did above these are pretty self explanatory however.

Thank you all for reading todays blog I hope you enjoyed and be sure to check out my youtube channel for cooking and gaming videos. Link: https://www.youtube.com/channel/UCrlNUqQVBxLIbdltHQBdcYg

Java Script Lesson 2: Console log and more possibilities.

This lesson is essentially a continuation of lesson one but it has information that is just as crucial. So we are just going to continue from where we left off.

So as I said before you can only add strings. As these inputs are rightfully not viewed as numbers. Which gives us some pretty interesting options but it also limits us at the same time.

adding strings

For example the code above will give us the same output as the input “Hello World”

different ways to write the code

As you can see both lines of code resulted in the same output but one thing I forgot to mention is that if you are using the addition operator you need to add a space after each word in the sentence otherwise they will end up as one word.

But enough about the addition operator lets use the other operators with numbers.

The first operator that we should use is the subtraction operation which works opposite to the addition obviously and it subtracts one value from the other. The same way it would work in a math problem but it looks a little bit different

Just as expected our result from 10-1 came out to 9. The other 2 main operators work the same way which are division and multiplication. Which means they work the same way they would in a regular math problem. The only difference is what symbols are being used which for multiplication is the star “*” and for division is the backslash “/”.

Division and Multiplication operators

And yes in case you are wondering 9 is my favorite number. But the next thing we can do with these operators is the most useful in my opinion which is combining them to solve math problems very quickly which can get us to our first project which will be making a calculator! But we still have a few lessons before that. Anyway here are some examples of combining operators to solve some equations

Combined operators

As you can see these operators can be used to a near infinite scale and they can calculate all these different equations in an instant which will be the main base for our calculator project that we will be starting soon.

Thank you all for reading and feel free to check out my YouTube channel where I upload video game and cooking things link: https://www.youtube.com/channel/UCrlNUqQVBxLIbdltHQBdcYg