Basic Movement Scripts

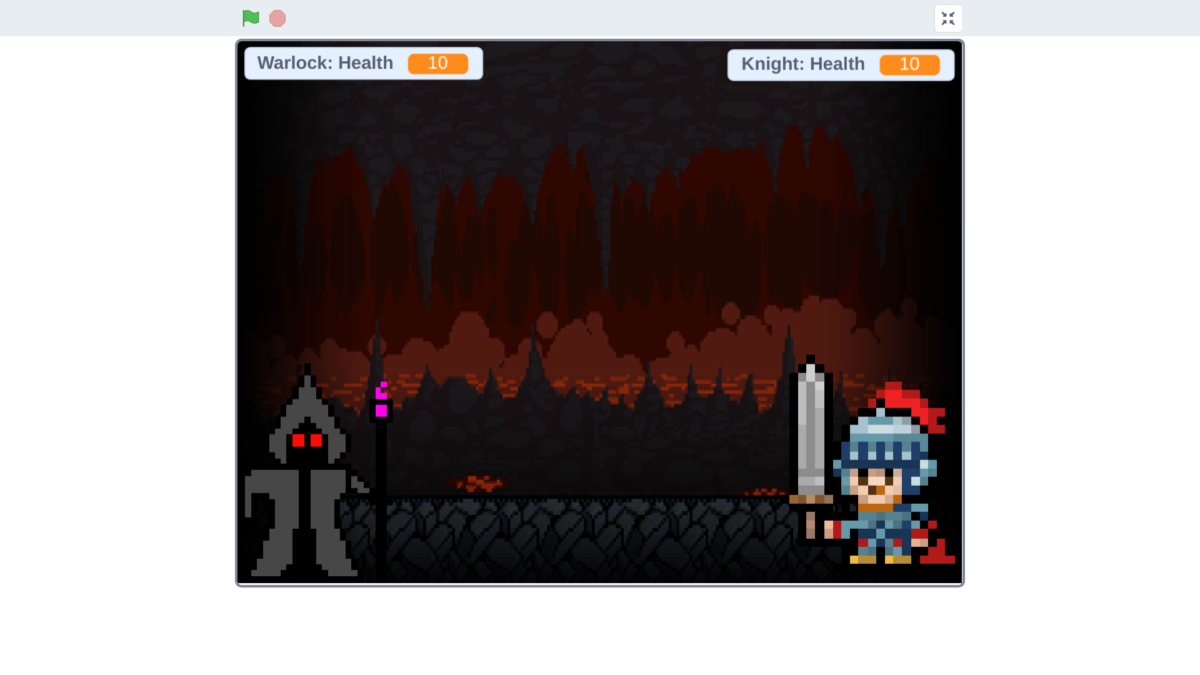
Now that I have touched base on the basic scratch terminology I can show you how to start coding your sprites to move, think, and talk! When you start a new project on scratch there will only be one sprite loaded in and it will be a waving cat known as Scratch Cat.

This is scratch cat and your first sprite.

Once the project has loaded you can go to one of the three tabs on the top left of your screen labeled Code, Costumes, and Sounds. Those tabs are where the magic happens in Code you insert blocks of code and connect them to a Green flag block. In the costume tab you design costumes fro your sprites as well as your backgrounds. Finally we have the Sound tab where we can add sounds to anything a sprite does to make the game more entertaining.

These are the three tabs fro coding a sprite.

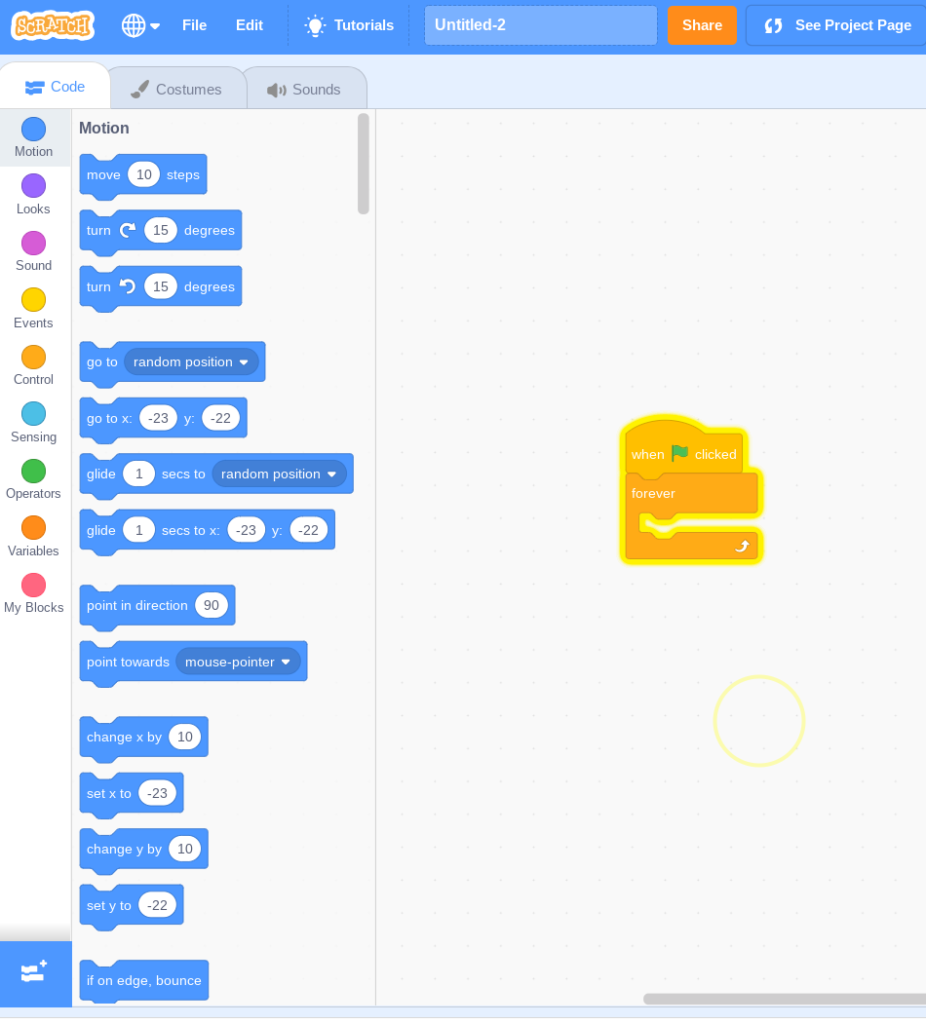
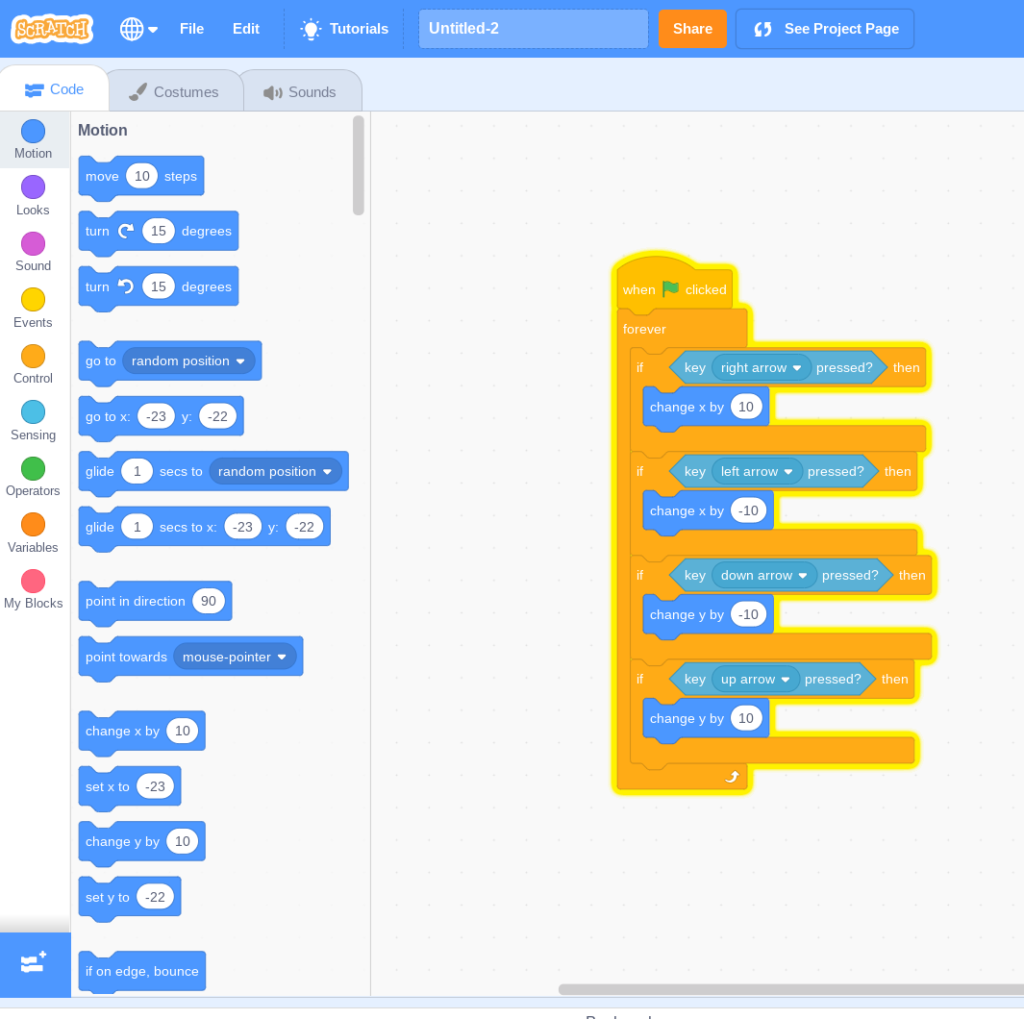
Now that you know these basics we can get started on coding some movement scripts. First of all you want to start by dragging a Flag Block from the left hand side of your screen, next you should drag out a block that says forever because without this block the code will only repeat once and the game will not function.

This picture is me dragging out my flag block and my forever block.

After which we will add 4 blocks that say “if ___ then” on them with a big hole in the middle. If I were to fill the blank with another block then I could put command blocks inside the “if___ then” block to tell the sprite how to react.

Now we are telling the sprite to recognize the new blocks we added in.

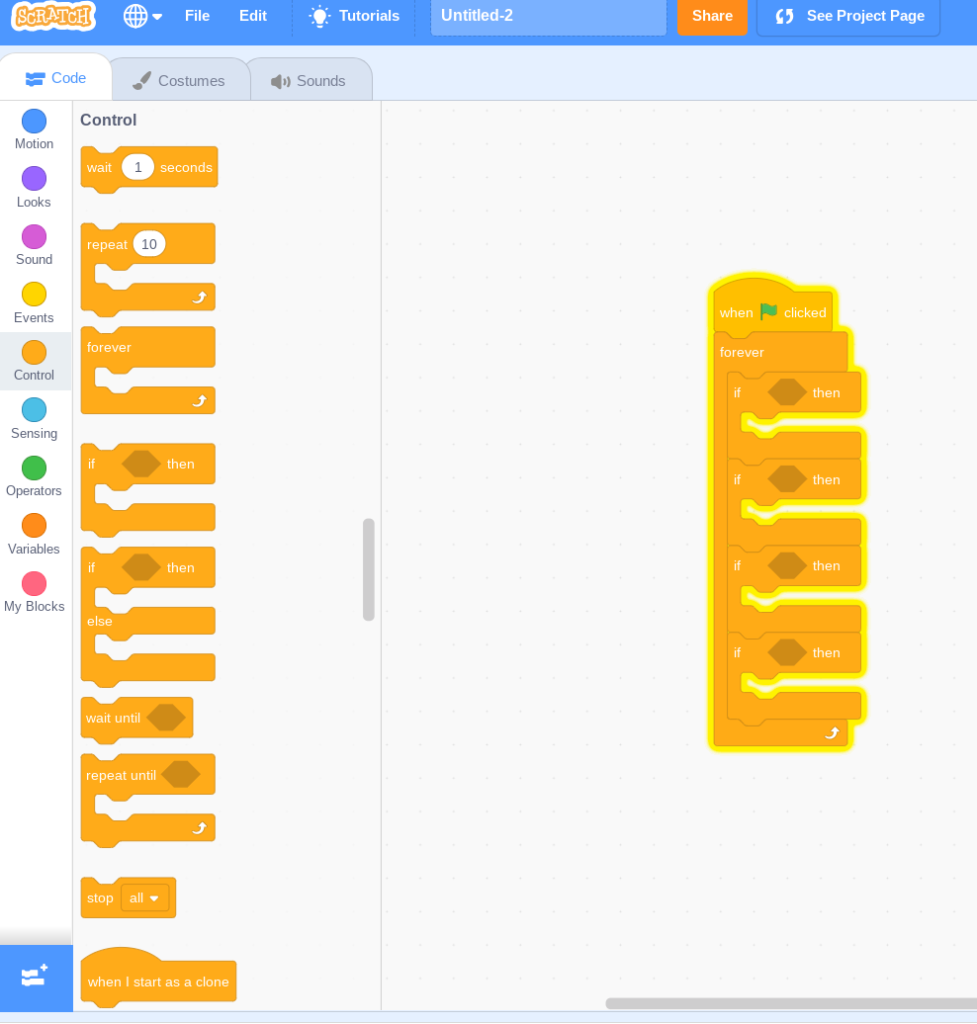
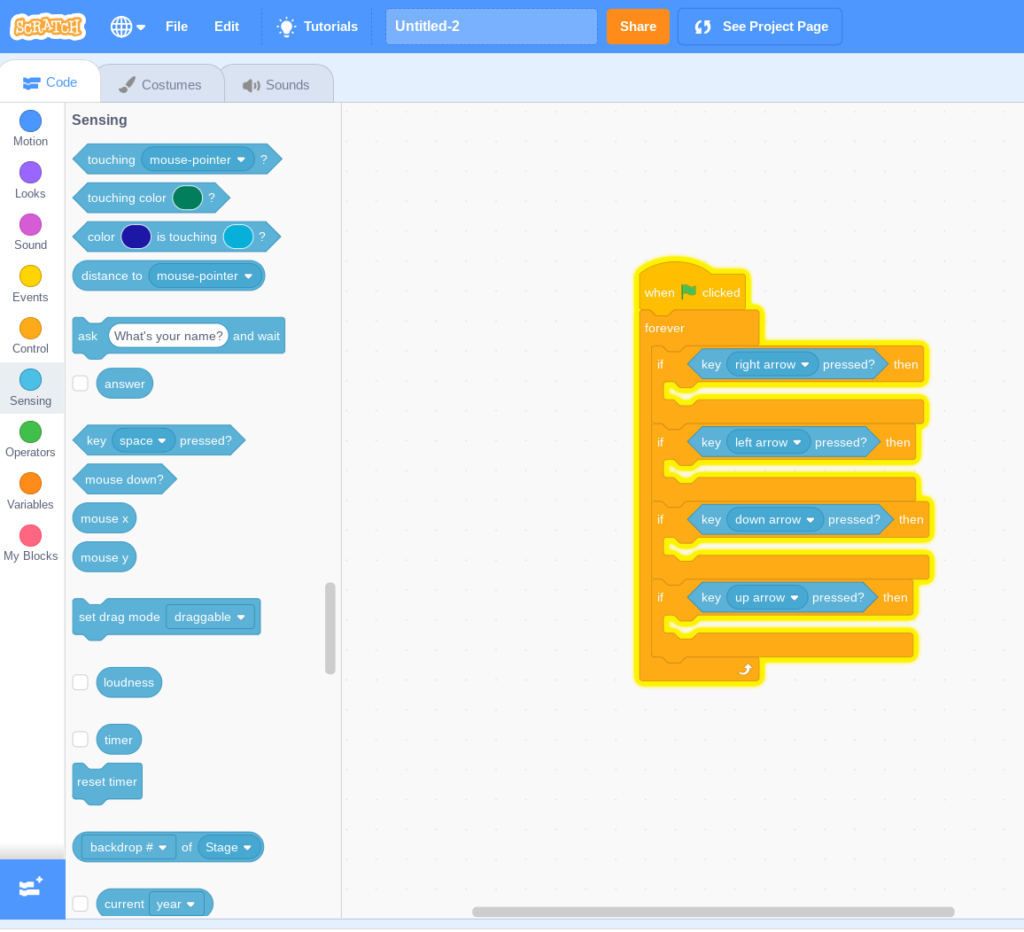
Once we added the “If___ then blocks” we will put in an” key right arrow pressed?” inside the first “If____ then block.” And for the second block we put in a “key left arrow pressed?” For the third block we put in “key down arrow pressed?” Finally in the fourth “If____ then block” we will add “key up arrow pressed?”

In this step we are telling the sprite to do something when arrow keys are pressed.

For the next step we will get a “change x by 10 block” into our “If____ then block” by simply dragging it into the correct block. “The change x by 10” goes in block number one. The change x by -10 goes in block two. The change y by -10 goes in block three. Lastly The change y by 10 goes in block 4.

Finally in this picture the sprite will move around the screen fluidly.

Now if you did all the steps correctly the game should be flowing smoothly. Thanks for sticking to the end of this blog entry and stay posted for another one in 2 weeks!!!

Game 1 : 2 Player Battle Simulator

In this blog entry I will be showing you a sneak peek at one of my latest games called 2 Player Battle Simulator. In this game you and a friend can battle it out using your choice of either a Warlock or a Knight. You can move your character, throw up a shield, shoot an attack, or destroy an enemy shield. In the end there is an awesome animation where you can watch as your enemy turns to dust at your feet and you will get glorious bragging rights.

Essential Scratch Terminology

For any new coder learning the terminology for coding on scratch is crucial. In this article, I’ll be explaining what various aspects of a game on Scratch are. These will include: Sprites, costumes, stages, and command blocks.

Allow me to start by explaining what a sprite is. A sprite is any character or object in a game that moves or does any actions whatsoever. They are important because no game can be made without sprites. Sprites can be drawn or uploaded. Scratch has a costume creator which allows you to draw your own sprites. Uploaded sprites can come from any google image (they must be downloaded to the computer and then uploaded on Scratch).

Another important aspect of Scratch are costumes. The appearance of a sprite is called a costume. Costumes give sprites their shape, form, and color. Costumes have an added benefit of making the game visually appeasing. Costumes can be anything drawn or uploaded from your computer. Lastly, costumes can be replaced and there can be multiple costumes on a single sprite.

Stages, also known as backdrops, are the background for a game. They can be customized like costumes and can be any shape, form, or color. Stages can also be drawn and uploaded from your computer just like sprites. The reason why stages are important is because they are the first thing that catches the eye of the player. Oftentimes, this first impression can determine whether or not someone will play your game. Stages can also set the mood for your game and can be made to move for a more immersing experience.

The final Scratch terminology that will be covered are command blocks. Command blocks are color coded blocks that dictate how the game plays. They control everything from a sprite’s movement, emotes, and costume changes to stage changes and game events such as win or loss cases (the requirement that must be met to win or lose a game).

With the knowledge/understanding of the main terminology behind Scratch, anyone can make an amazing game.

Welcome to the Blog!

Hello and Welcome! Thanks for visiting my coding blog! Here you will find lots of interesting and enjoyable posts on how to create games on the coding website Scratch. All of my tutorials will include pictures to help build a visually pleasing display. In addition, they will include a play by play on all the steps to code various types of games.