Hello and welcome back to another blog post and of course another part of our project. We are getting quite close to the end of this awesome project. But first we need to finish our prestige shop and maybe work on rebirths. But we are pretty much done with the main part of our app.
To get started no one on the last post was able to guess what the ability was so I guess I’ll have to tell you guys now. This ability is called Chrono warp with the 50 ptoken offering you are able to recruit Chronos to hop forward in time to help you gather shields. Now lets start with the code.

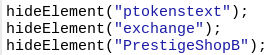
We first need to create and hie these 3 elements. The first one tells the user when a chrono warp activates. The second is an image in the shop and the last one is the actual shop button.
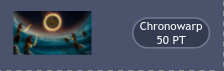
These are chrono warp image and button respectively

This is “chronoinfo”
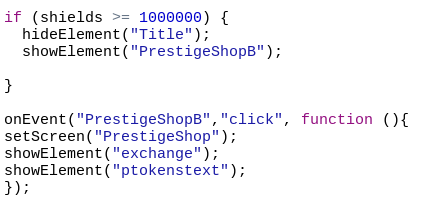
Now with these in place we can actually start writing code for them.
We will start with the Chrono warp button, This button will use the following code which I will break down.
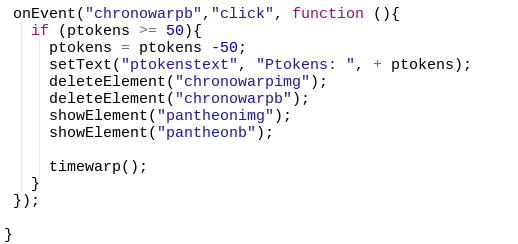
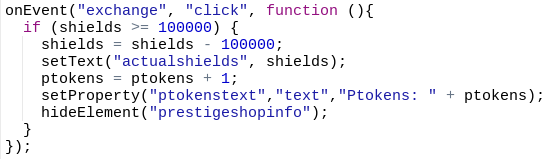
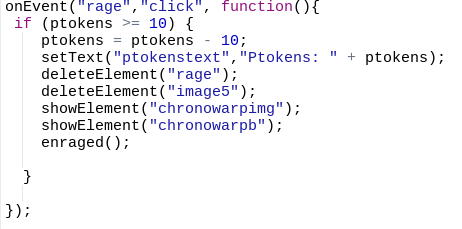
This code will start by checking if the user presses the button firstly. Next it checks if the user has 50 ptokens or more. It then subtracts them from the total and updates the text.
After which it deletes it’s own shop image and button to make room for the new and final addition to our prestige shop which is the pantheon. Just like with chronowarp this is a hint for the next item that will be coming into the shop. If someone can guess what this ability will do in the comments below then they will get to add one feature to the app (that is appropriate) and will be featured in my next blog so leave a comment with your ideas below.
Back to the code
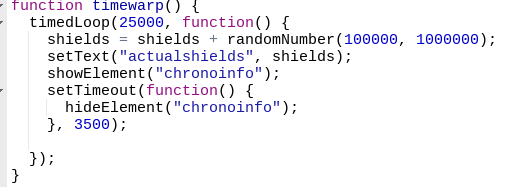
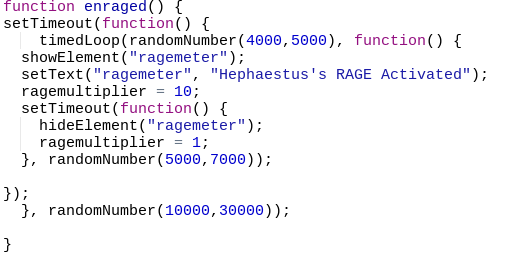
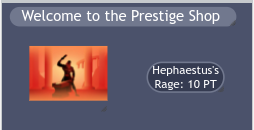
This is the code for our actual chronowarp function it works kind of similarly to Hephaestus’s Rage, however it adds shields directly as opposed to adding a multiplier.
To start it calls the function ever 25 seconds because of our timed loop so that the ability isn’t constantly activating . It then adds a random amount of shields to our shield count. Any number from 100,000 to 1,000,000 shields. Following this it updates our actual shield count, Shows chrono info, and then waits 3.5 seconds to hide chrono info so people can read it.
I hope you all enjoyed this blog post see you next time and make sure to leave a comment with your ideas down below.